Google Analytics is a robust tool that can help measure your website’s traffic and performance. However, it’s essential to set it up correctly to make the most of Google Analytics. And if you need to track your website’s traffic and engagement levels with Google Analytics, you’re missing out on a valuable source of information. In this guide, I’ll explain to how to setup Google Analytics 4 so you can start tracking your website’s data. I’ll also cover some of the basics of how to use Google Analytics so that you can get the most out of this powerful tool. So let’s get started!
Google Analytics 4 is the updated version of Google Analytics. It includes a number of new features, including support for Google Ads and Google Search Console. Google Analytics 4 also includes a new user interface and a new reporting system. It is available now to all Google Analytics users and is compatible with all major browsers, including Internet Explorer, Firefox, Safari, and Google Chrome.
One of the most stunning new features is seeing data from multiple devices in one place. This means you can see how many people interact with your website across desktop, mobile, and tablet devices. Google Analytics 4 also includes deeper insights into what people are doing on your website, including which pages they visit and how long they stop on each page. A new event-tracking tool makes tracking button clicks, form submissions, and other meaningful interactions easy.
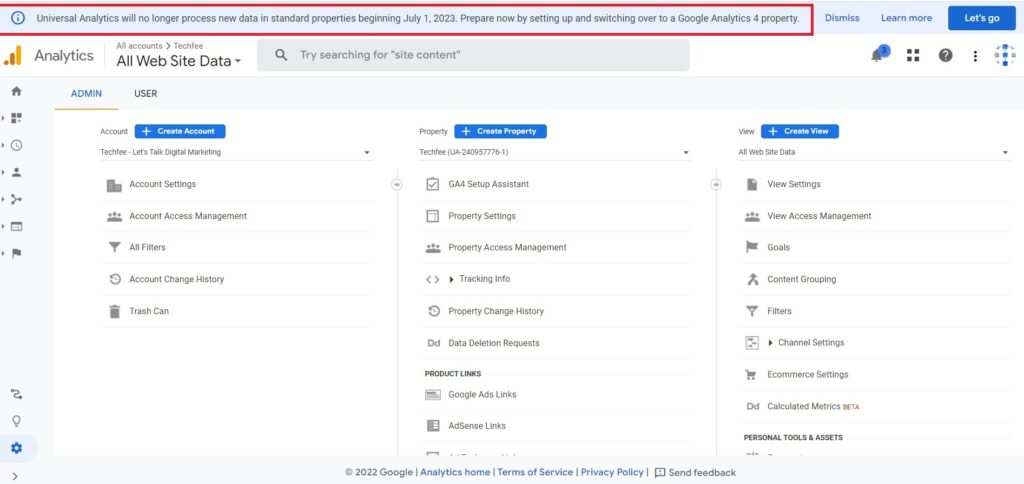
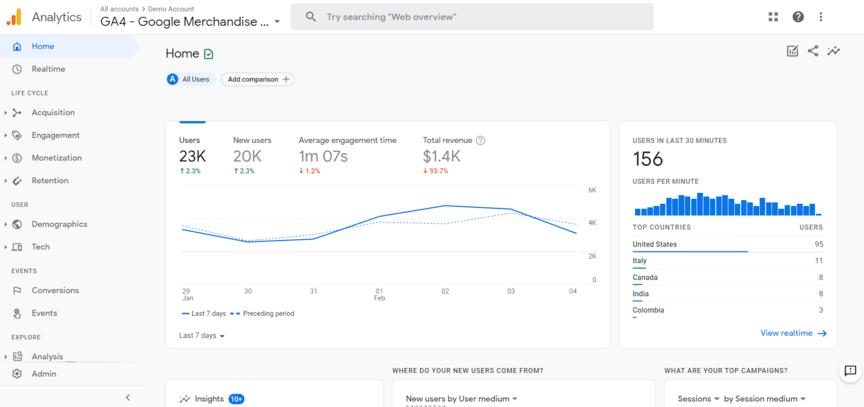
How to Setup Google Analytics 4 (GA4) Property?
Setting up GA4 is easy and only takes a few minutes. If you’re new to GA4, start by creating a new property in your Google Analytics account. Then, follow these simple steps:
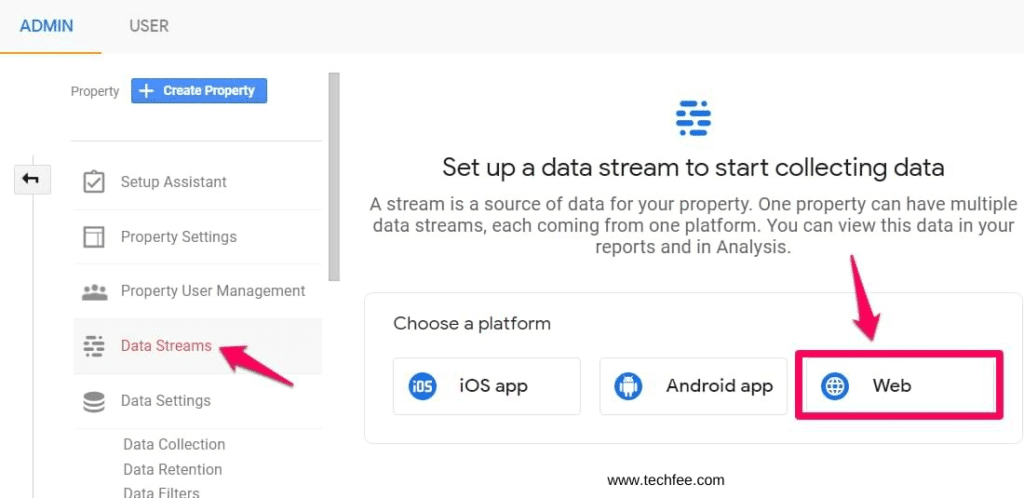
1. Choose the platform that you’ll be using to collect data. GA4 offers web, app, and measurement protocol support.
2. Select the data stream that you want to create. You can choose from the web, app, or other data sources.
3. Configure your data stream. This includes choosing the data schema and setting up data collection options.
4. Set up optional features. This includes choosing how you want to collect and process data and setting up advanced options such as marketing integration and user ID tracking.
5. Save your changes and start collecting data!
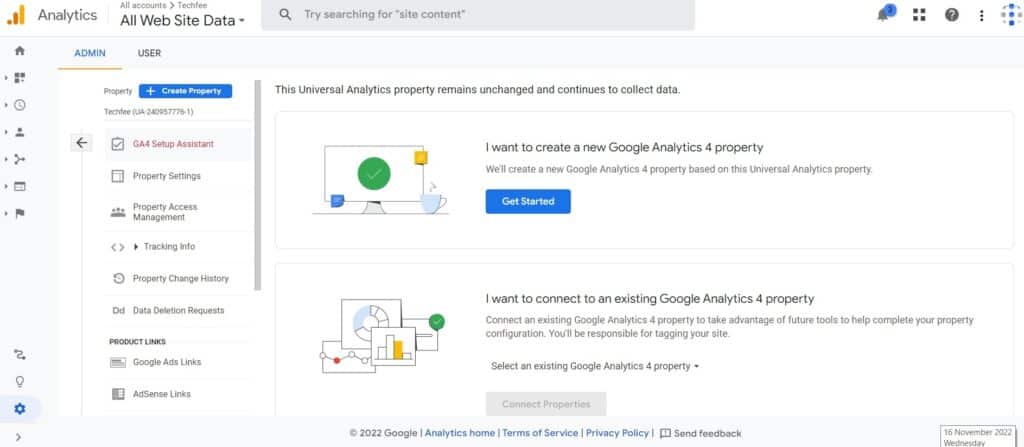
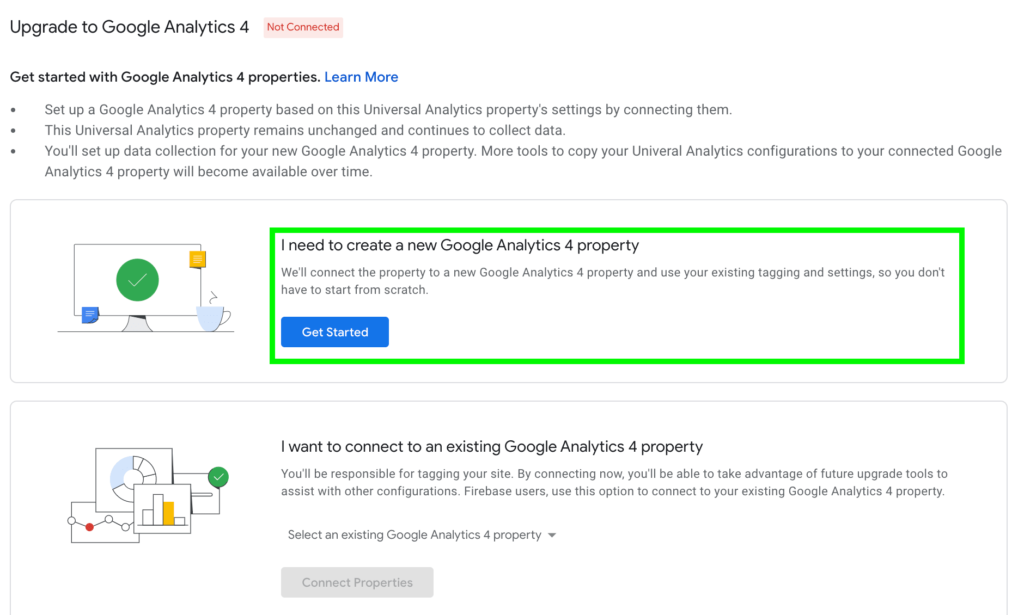
How to Update Existing Universal Analytics Property Account to GA4 property?
To update an existing Universal Analytics (UA) property to a GA4 property, you’ll need to:
- First, create a new GA4 property in your Google Analytics account.
- Then, you’ll want to set up how to measure your data in this new property by selecting the appropriate data streams. For example, if you’re going to track web data, you’ll want to choose the Web Data Stream option under the “Property Type” section.
- After you’ve done that, you’ll be given a tracking code that you’ll need to add to your website so Google Analytics can start collecting data for your new GA4 property.
- Now that your new GA4 property is all set up and tracking data, you can go into your UA property and update the tracking code to point to your new GA4 property.
- And that’s it! You’ve now successfully updated your UA property to a GA4 property.
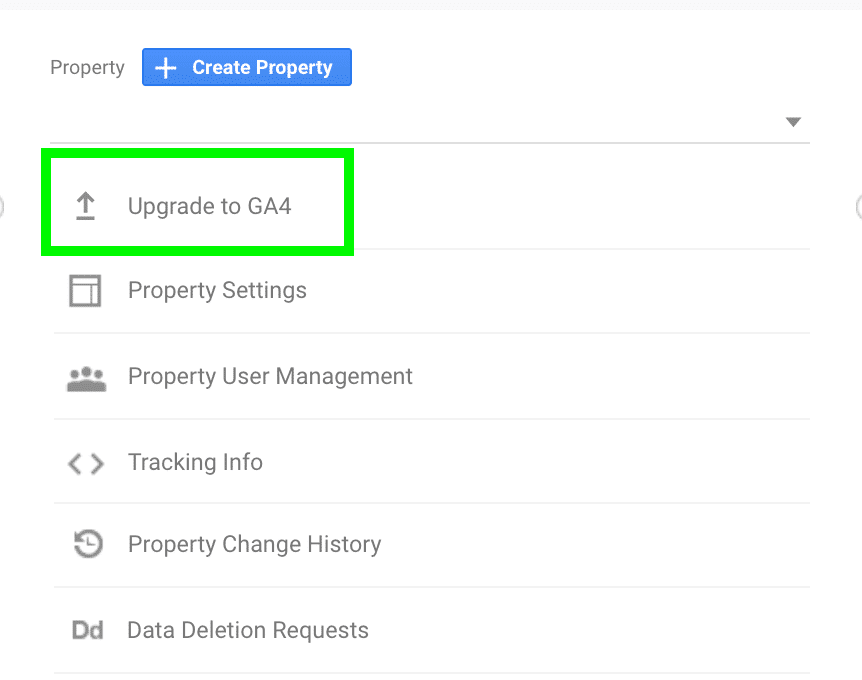
Creating and Setting Up Your Data Streams
Data Streams in GA4 refer to the continuous flow of data collected from various sources and used to generate insights. Data streams can come from online and offline sources, including website traffic, application usage, CRM data, etc. The key benefit of data streams is that they provide a complete picture of customer behavior, which can be used to improve the customer experience and drive business growth.
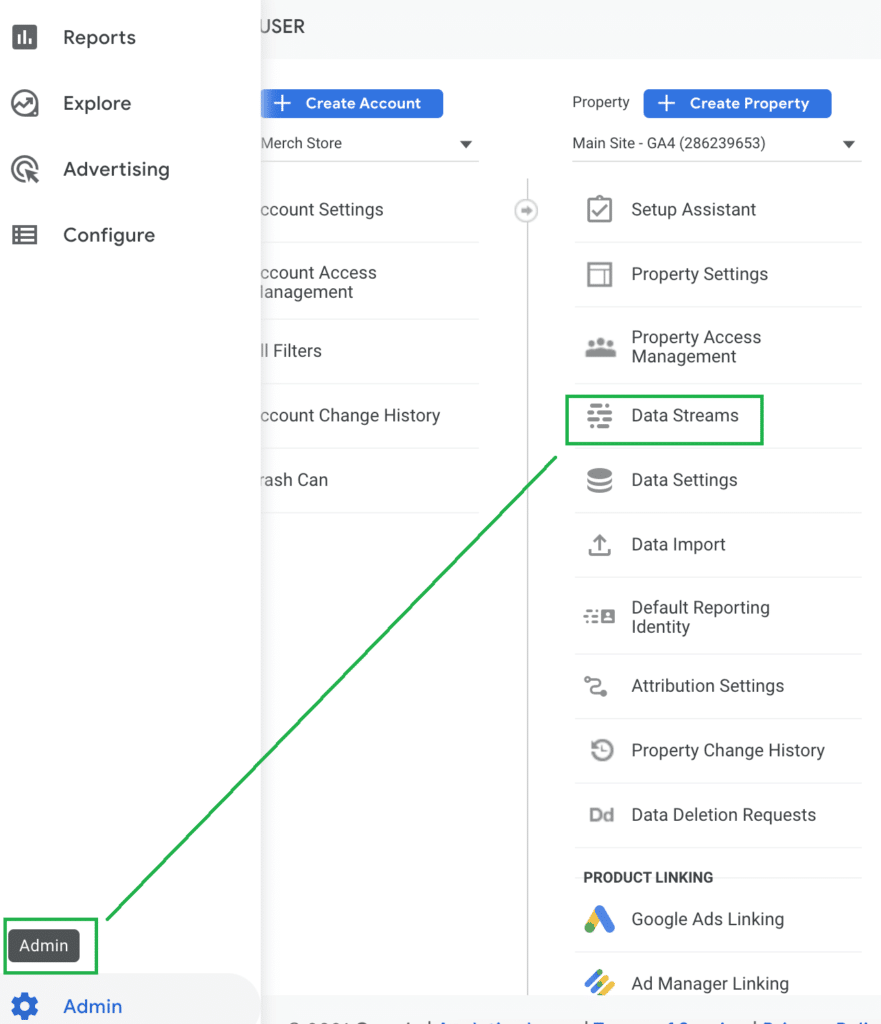
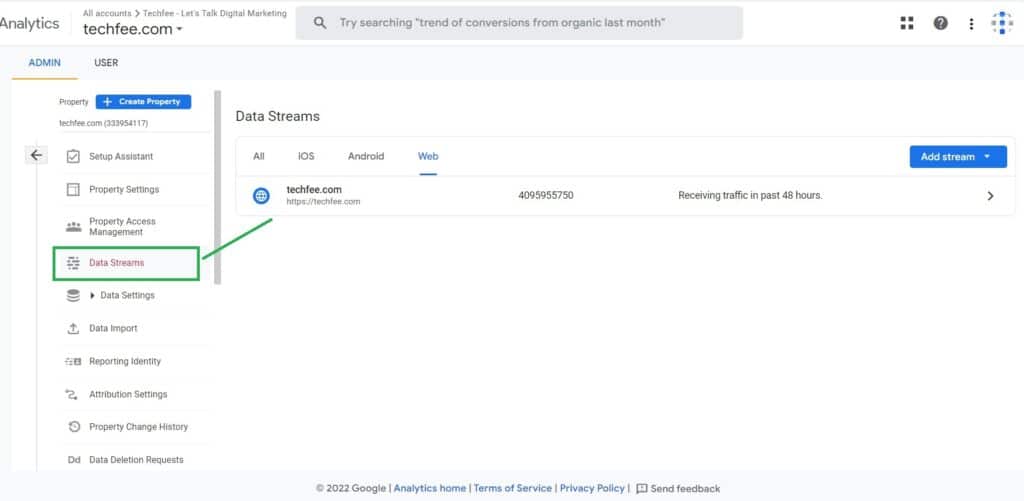
If you’re like most people, you must have a good handle on setting up data streams in Google Analytics 4 (GA4). But just in case, I thought I’d give a quick overview. First things first, you need to create a data stream. To do this, go to the Admin panel and click on ‘Data Streams’ in the ‘Property’ section. Then, click ‘Create Data Stream.’
Once you’ve done this, you’ll be asked to provide basic information about the stream, such as its name and ID. Once you’ve filled out this information, click ‘Create.’ Now that your data stream is created, it’s time to set it up. The first thing you’ll need to do is choose the data source that will be used to populate the stream. To do this, go to the ‘Data Source’ tab and click ‘Add Data Source.’ Then, select the desired data source from the list and click ‘Add.’ That’s it! Now your data stream is all set up and ready to go.
How Google Analytics 4 Differs From Universal Analytics?
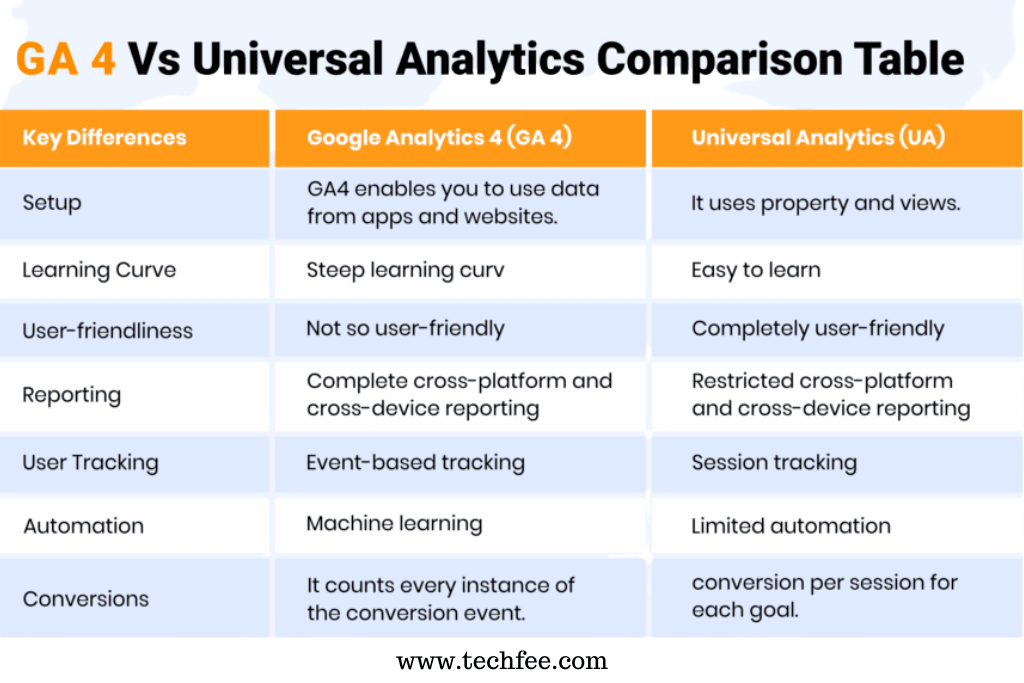
Google Analytics 4 is the updated version of Google Analytics, including some significant changes from the previous Universal Analytics.
The most significant difference between Google Analytics 4 and Universal Analytics is the data model. GA4 uses a technology called “User ID,” which allows for cross-device tracking and attribution. This means that if a user visits your site on their phone, then comes back later on their desktop, GA4 will be able to track that activity and attribute it to the same user. Universal Analytics, on the other hand, relies on cookies which are much less effective at cross-device tracking.
In addition, GA4 offers built-in machine learning, which can be used to automatically generate insights and predictions. Universal Analytics does not have this feature. Finally, GA4 includes several new features designed to make it easier to adhere to data privacy regulations like GDPR and CCPA. These features include data deletion and retention controls and the ability to anonymize IP addresses. Universal Analytics does not offer these features.
Thanks to its enhanced machine learning capabilities, Google Analytics 4 also offers more insight into user behavior. And it’s designed to work seamlessly with other Google products, like Firebase and BigQuery.
Overall, GA4 is a more robust and privacy-friendly platform than Universal Analytics. However, it is essential to note that Universal Analytics will continue to be supported by Google for the foreseeable future. So if you’re happy with UA, there’s no need to switch to GA4 just yet.
How to Connect Google Analytics4 to BigQuery?
If you’re using Google Analytics 4 (GA4), you can now connect it directly to BigQuery, Google’s powerful data warehouse. This will allow you to run complex queries on your GA4 data and get insights that you wouldn’t be able to get with the standard GA4 interface. Let me show you how to connect GA4 to BigQuery.
First, make sure that you have a GA4 property and that you have admin access to both GA4 and BigQuery. Then, go to the Admin section of GA4 and click “Data Warehouses.” From there, you’ll be able to connect your GA4 property to your BigQuery project. Once you’ve done that, your GA4 data will start flowing into BigQuery.
You can access your GA4 data in BigQuery by going to the “Datasets” tab and selecting your GA4 dataset. From there, you can run queries on your data using SQL. If you’re not familiar with SQL, don’t worry – there are plenty of resources available online to help you get started.
BigQuery is a powerful tool that can help you get more out of your GA4 data. If you haven’t already connected GA4 to BigQuery, we highly recommend doing so.
Connect to Google Ads
If you’re running a business, tracking your website traffic and understanding where your visitors are coming from is essential. Google Analytics is absolutely a free tool that can help you do just that. But what if you’re using Google Ads to promote your site? In that case, you’ll want to connect Google Analytics 4 (the latest version) to your Google Ads account. Here’s how to do it:
1. Sign in to your Google Analytics 4 account.
2. Click Admin, then select Data Streams from the property column.
3. Click the data stream you want to connect to Google Ads.
4. In the Integration tab, click Google Ads.
5. Next, follow the instructions on the screen to connect your accounts. Once you’ve completed the process, your GA4 data will appear in your Google Ads account within 24 hours.
That’s it! Once you’ve completed these steps, you’ll be able to see your Google Ads data in Google Analytics 4. You can use this information to track your campaign performance and understand which ads are driving the most traffic to your site.
What is Google Tag Manager?
If you’ve ever used Google Analytics, then you’re familiar with the process of adding tracking tags to your website. Tracking tags are small snippets of code that allow Google to collect data about your website visitors. This data is then used to create reports that can help you improve your website.
Google Tag Manager is a tool that simplifies the process of adding tracking tags to your website. With Tag Manager, you can add and manage all your tracking tags in one place. You can also use Tag Manager to create and manage targeted audiences for your Google AdWords campaigns.
To use Tag Manager, you first need to create a container tag. This tag will hold all your other tracking tags. Once you’ve created your container tag, you can add tracking tags to it. You can also add triggers, which are conditions that determine when a tag should fire. For example, you could create a trigger that fires a tag when a user visits a specific page on your website.
Once you’ve added all your tags and triggers, you can publish your container. This will make all your tracking tags live on your website. Google Tag Manager is also a free tool that can save your time and headaches when adding tracking tags to your website.
How to Setup Google Analytics 4 with Google Tag Manager?
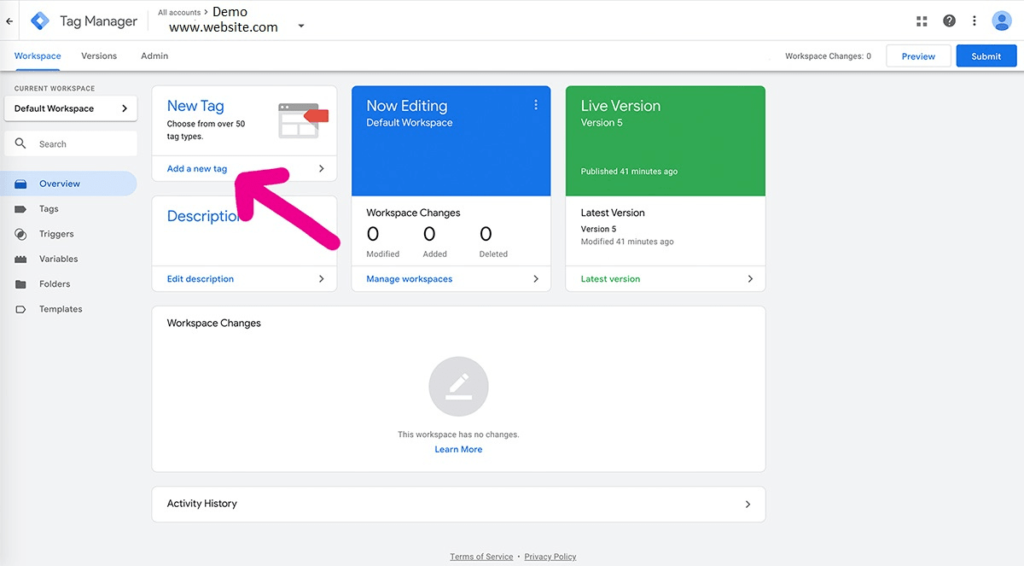
First, you’ll need to create a new GA4 property in your Google Analytics account. You can set this up by going to the Admin section and selecting ‘Create Property’ from the drop-down menu.
Next, you’ll need to create a new TAG in GTM. To do this, go to the Tags section and click ‘New Tag’. In the box that appears, select ‘Google Analytics: GA4 Configuration’ from the list of Tags.
Now you’ll need to Configure your TAG. The first thing you’ll need to do is specify your Tracking ID. This can be found in your GA4 property under the ‘Property Settings’ section. Once you’ve entered your Tracking ID, select ‘Page View’ as the Track Type. You can also add any other tracking options that you want to include, such as Event Tracking or Conversion Tracking. Finally, click ‘Create Tag.’
Your last step is to Trigger your TAG. Go to the Triggers section and click ‘New Trigger.’ In the trigger configuration box that appears, select ‘All Pages’ from the trigger conditions drop-down menu. This will ensure that your TAG fires on all pages of your website. Finally, click ‘Create Trigger.
And that’s it! You’ve successfully set up GA4 with GTM. Now you can start tracking your website traffic and events using GA4.
How to Add GA4 Tracking Code to Website Without Using Google Tag Manager ?
There are a few different ways to add GA4 tracking code to your website without using Google Tag Manager. The first is simply adding the code directly to your website’s code. This is typically done in the header or footer section of your site. If you’re uncomfortable adding code to your site, you can use a plugin like Add GA4 Tracking Code for WordPress.
This will add the code automatically for you. Finally, if you’re using a third-party platform like Shopify, they may have their own instructions for adding GA4 tracking code. Whichever method you choose, be sure to test your implementation before going live!
Set Up Goals and Conversions
One of the finest things about Google Analytics 4 is that it makes it easy to set up goals and conversions. By doing this, you can track how well your website or app is performing in terms of achieving your desired outcomes.
To set up goals and conversions, first go to the GA4 admin panel and select “Data Settings.” Next, click on the “Goals” tab and like “Create Goal.” From here, you’ll be able to choose what type of goal you want to track (e.g., page views, time on site, etc.), as well as give your goal a name and description. Finally, click “Save,” and you’re all set!
You can also set up conversion tracking in GA4. This is similar to setting up goals, but with conversion tracking, you’ll be able to see not only how many people are converted, but also how much money they’re spending. To do this, go to the “Data Settings” panel again and click on the “Conversions” tab. From here, you can set up your conversion tracking by following the prompts. Once you’re done, click “Save,” and you’re all set!
Test Your Setup
There are various ways to test your Google Analytics 4 setup to ensure it’s working correctly. One way is to set up goals and conversions. This will help you track whether or not users are completing the actions you want them to take on your site.
Another way to test your setup is to use the Google Analytics debugger extension. This extension will help you identify any potential issues with your tracking code.
Finally, you can also use the Google Analytics 4 validator tool. This tool will check your tracking code for errors and give you a report of any problems that need to be fixed. By using these tools, you can be sure that your Google Analytics 4 setup is working correctly.
Or you can also test this setup through google tag assistant in Google Tag Manager.
Google Analytics 4 Best Tips and Tricks
There’s no doubt that Google Analytics 4 is a powerful tool for understanding your website traffic. But with so many features and options, it can be challenging or tough to know where to start. So if you’re looking to get the most out of GA4, here are two or three tips and tricks that can help:
– Use segments to understand different groups of users: Segments allow you to break down your data by other criteria, such as location, device, or behavior. This can be a helpful way to understand how different groups of users interact with your site.
– Use events to track specific interactions: Events allow you to follow particular interactions on your site, such as button clicks or video views. This data can be valuable in understanding what type of content is best received by your audience.
– Use goals to measure success: Goals let you track specific conversions on your sites, such as newsletter signups or product purchases.
By setting up goals, you can better understand which areas of your site drive the most valuable results.
By taking advantage of these GA4 features, you can better understand your website traffic and how best to improve your site for your users.
Note: I can also recommend you the following video tutorial to learn step by step how to set up google analytics4 for your blog or website.
Conclusions
That’s all for now friends. I hope this article is of help to you and that you can set up your GA4 property without any issues. If there is anything that you are still confused about or need help with, please let me know in the comments below, and I will do my best to assist you. Also, don’t forget to check out my other blog posts for more tips and tricks on digital marketing!
Thank You.
Cheers!
Frequently Asked Questions
What is Google Analytics 4?
Google Analytics 4 is a data analytics platform that helps you understand your customer's online journey. It provides insights that help you improve your marketing and website design. Google Analytics 4 also allows you to track how customers interact with your brand across multiple devices. You can use Google Analytics 4 to track sales, leads, and conversions.
The platform also provides insights into customer behavior, such as what they search for and what they click on. Google Analytics 4 is a powerful tool to help you grow your business.
What are the benefits of using Google Analytics 4?
Google Analytics 4 offers a number of benefits that can be extremely helpful for businesses, large and small. One of the biggest benefits is the fact that GA4 provides more accurate data than ever before. This is thanks to the new machine learning algorithm that GA4 uses to process data.
In addition, GA4 offers improved user ID tracking, which helps businesses better understand their customer journeys. Another benefit of GA4 is that it makes it easier to collect first-party data. This data is extremely valuable for building targeted marketing campaigns. Finally, GA4 integrates with other Google products and platforms, making it even easier to track and analyze data. All in all, there are plenty of good reasons to start using Google Analytics 4 for your business.
How do I add people to my Google Analytics 4 account?
You can add people to your Google Analytics 4 account in a few simple steps:
- Click on the "Admin" tab in the left sidebar.
- Click on the "User Management" option in the middle column.
- Click on the "+ Add new users" button in the right column.
- Please enter the email addresses of the people you want to add and select their user type.
Once you've added all the desired users, click the "Save" button at the bottom of the page. Now, everyone you've added can access your Google Analytics 4 account.
What are Google Analytics 4 events?
Google Analytics 4 Events (GA4E) are a new type of Google Analytics data that offers more flexibility and advanced features than the traditional Google Analytics tracking code. GA4E lets you collect and analyze data from any web or app-based event, such as page views, link clicks, form submissions, and eCommerce transactions.
In addition, GA4E provides deeper insights into user behavior, including how users interact with your content and what actions they take after viewing your site or app. With GA4E, you can also track user engagement across multiple devices and platforms, making it an essential tool for understanding your audience and improving your marketing efforts.
How do I set up event tracking in Google Analytics 4?
Event tracking can be a great way to measure user engagement on your website or app. With Google Analytics 4, you can setup event tracking for any interaction you want to measure. To setup event tracking, you first need to create an event category. This is the broadest category for your event, and it will be used to group together similar events.
For example, if you're tracking button clicks, you might create an event category called "Button Clicks." Once you've created an event category, you can then setup individual events within that category. Each event can have its own unique name, and you can specify the parameters that you want to track. For example, you might setup an event called "Add to Cart" and track the value of the items added to the cart. You can also specify whether an event is non-interaction or not. This designation is useful for tracking things like pageviews or downloads, which don't necessarily require user interaction. By setup up event tracking in Google Analytics 4, you can get detailed insights into how users are interacting with your site or app.
Setting up event tracking in Google Analytics 4 is actually pretty simple. You just need to add a few lines of code to your website. First, you need to create an account and property in Google Analytics 4. Then, you need to get your Tracking ID from the Admin page. Next, you need to add the code snippet from Google Analytics 4 to your website. Finally, you need to add an event tag for each event you want to track. That's it! Once you've added the code snippet and event tags, you'll be able to start tracking events on your website.
How do I create a Google Analytics 4 channel?
First, you'll need to create a property in your Google Analytics account. Once you've done that, you can then set up your channel by creating a data stream. To do this, you'll need to connect your Analytics account to your Firebase project. Once you've done that, you can start sending data to your Analytics account. Finally, you can view and analyze your data in the Analytics 4 interface.
Creating a Google Analytics 4 channel is easy! First, sign into your Google Analytics account and select the "Admin" tab. Next, click on "Data Streams" and then "Create Stream." Now, all you need to do is give your channel a name and select "Google Analytics 4" as the data source. Once you've done that, click "Create Stream," and you're all set!
What are Google Analytics 4 bot commands?
Bot commands are a set of directions that you can give to google analytics 4 in order to complete certain tasks. There are bot commands for things like setting up goals, adding new events, and creating filters. You can also use bot commands to get reports or data about your google analytics 4 account.
These commands allow you to interact with Google Analytics 4 in a more natural way, using conversational language. For example, you can ask GA4 to show you your top keywords, or to compare traffic from two different time periods. You can even ask GA4 to send you report updates via email or chat. To get started, type "ga4" into your chat client (e.g., Slack, Hangouts Chat, etc.), followed by the command you want to use.
To use bot commands, type "/" followed by the command you want google analytics 4 to execute. For example, if you wanted google analytics 4 to set up a goal for you, you would type "/goal." Bot commands are a quick and easy way to get the most out of google analytics 4.
How do I set up a Google Analytics 4 bot?
There are a few simple steps you can take to set up a Google Analytics 4 bot:
- You'll need to create a new property in your Google Analytics account.
- You'll need to select the "Bot Filtering" option in the hot property setup flow.
- You'll need to add the appropriate code snippet to your website or app.
Once you've completed these steps, your Google Analytics 4 bot will be up and running!
What are Google Analytics 4 reporting features?
Google Analytics 4 reporting features are pretty awesome. They help you to see how your website is performing and where you can improve. For example, you can see how many people visit your site, what pages they look at, and how long they stay on each page. You can also see what device they're using, what country they're from, and what browser they're using. All of this information can be really helpful in understanding your audience and making sure that your website is meeting their needs.
Additionally, the reports can be customized to show only the data that you want to see, which makes them even more useful. Overall, Google Analytics 4 reporting features are a great way to get a detailed look at your website's performance and make improvements accordingly.
How do I troubleshoot Google Analytics 4?
If you're having trouble with Google Analytics 4, there are a few things you can do to troubleshoot the issue. First, check to make sure that the tracking code is properly installed on your site. If the tracking code is not installed correctly, data will not be collected properly. Second, check your traffic sources to make sure that data is being collected from all of the places you expect. If traffic data is not collected from a particular source, the tracking code is likely not installed on that site. Finally, check your reports to make sure that the data being collected is accurate. If you notice any discrepancies, something may be wrong with how the tracking code is configured. By troubleshooting each of these issues, you can ensure that Google Analytics 4 is properly working on your site.


